
Stepping into app development with Weex can feel exciting yet overwhelming. Designed for speed, efficiency, and cross-platform flexibility, Weex empowers developers to build high-performance apps with ease. This Weex review breaks down its core features and advantages, helping you avoid common pitfalls and get started with clarity. Whether you’re a first-time user or exploring new frameworks, this guide shows why Weex is a game-changer and how to master it step-by-step.
What Makes Weex Unique for Cross-Platform Development?
Weex is light, nimble, and built for speed. That’s its magic formula for standing apart. Plenty of platforms promise cross-platform development, but here’s the thing they can feel heavy, bloated, and sometimes, painfully slow. Weex has sidestepped all that with a refreshing simplicity.
Let’s unpack this.
Weex in Action: Why It’s Worth Trying
For beginners, starting with Weex feels intuitive. Its smaller learning curve means you can shift from basic UI tweaks to advanced integrations quickly. Plus, once you understand its component-first approach, the entire framework becomes predictable. Effort in, results out.
If you’re feeling ready to start developing with Weex but aren’t sure where to begin, check out this step-by-step registration guide to get started.
So, what makes Weex unique? It truly rethinks how apps are built for diverse platforms while staying practical, speedy, and reliable.
How to Set Up Weex Efficiently for Your First Project
To begin your Weex project, preparation and setup are everything. The good news? It’s simpler than you might think if you approach it step by step. Here’s how you can efficiently set up Weex and jump into development without unnecessary stress.
1. Install the Core Dependencies
The backbone of any Weex project lies in its dependencies. To get started, you’ll need a reliable runtime environment for running JavaScript. Make sure this is installed on your machine first. If it’s already there, double-check it’s updated to the latest version to avoid compatibility headaches.
Next, grab a package manager preferably one that integrates natively with JavaScript. This will help you pull the required modules for Weex development. Install one globally if you haven’t already. Don’t skip this step; dependency management is crucial to avoiding project-breaking errors later.
2. Set Up the Weex Toolkit
To build, debug, and flash your app onto real devices, you’ll need the official Weex toolkit. Install it via your earlier setup package manager. Once that’s done, verify your installation by running a simple version-check command. Seeing version details? You’re good to move forward. If not, troubleshoot permissions or consult the toolkit’s documentation for solutions.
Pro tip? Always install the toolkit locally within your project’s directory. This avoids version clashes when working on multiple apps in the future.
3. Choose Your Integrated Development Environment (IDE)
Pick an editor or IDE that you’re comfortable with preferably lightweight but feature-packed. The goal here isn’t just to write code but to debug effectively. Look for editors that offer syntax highlighting, plugin support for Weex, and debugging integration. This will save you hours of frustration when something doesn’t behave the way you expect.
4. Project Initialization Made Easy
Initialize your first project by navigating to your chosen directory. From there, you’ll use a simple CLI command provided by the Weex toolkit to bootstrap a fresh app. This command generates a well-structured folder layout, complete with configuration files and templates to kickstart your work.
When prompted, opt for the default settings if you’re unsure what customizations to apply. These pre-configured templates are optimized for beginners while still being flexible enough for advanced tweaks later.
5. Configure for Your Target Platforms
Weex supports both Android and iOS platforms, but each requires specific setup steps.
iOS Setup:
- Make sure you’re working on macOS. Compatibility with iOS development tools is non-negotiable.
- Install the required libraries for compiling iOS apps. You’ll also need a platform development kit that offers a simulator to test your app.
- Configure certificates if you plan to build for a physical iOS device. This step is crucial for deployment.
Android Setup:
- Install an Android debugging bridge to easily connect your app with virtual or physical devices.
- Add a device emulator to test builds. Make sure your system paths include the emulator’s tools directory for smoother integration with Weex.
- Update platform-specific tools if prompted during installation. Outdated tools can lead to unexpected build errors.
6. Testing Your Environment
Before diving into app coding, ensure your setup works. Run the default app generated during project initialization on both iOS and Android simulators. Watch for errors and address them early while your project is still light and manageable.
Look for these essential checkpoints:
- Does the app render correctly?
- Are your interactions snappy and responsive?
- Is the app communicating as expected with external APIs if applicable?
If you encounter issues, revisit the configuration steps. A small oversight like a missing dependency or outdated tool can gum up the works.
7. Stay Organized
Before you move forward, take a moment to organize your directory. Split your assets, such as images or fonts, into dedicated folders. Modularize your code by grouping files by functionality. A clean structure makes future debugging and scaling far easier.
By the end of this setup, you’re ready to start creating with Weex. Need a deeper dive into account configurations or platform-specific quirks? Refer to online resources like this Weex sign-up guide for additional tips and tricks.
How to Register on Weex: A Step-by-Step Guide
Creating an account can feel overwhelming, but this step-by-step guide makes the process simple and error-free. Here’s how to get started:
1. Visit the Official Website
Open your browser and navigate to the platform’s homepage. Double-check the URL to ensure it’s the legitimate site always avoid phishing links.
2. Click on Sign-Up or Register
Look for the sign-up button, typically placed near the top-right corner. A simple click will take you to the registration form.

3. Enter Your Basic Information
Fill out the form accurately. Here are the typical fields:
Email Address: Use one you actively monitor.
Password: Create a strong password with a mix of characters (uppercase, lowercase, numbers, symbols

Referral Code : Use referal code “47gd” to get all bonus rewards
Tip: Save your password in a secure password manager right after creation.
4. Verify Your Email
Head to your inbox. You’ll likely find a confirmation email. Click the verification link inside the email to activate your account.
Tip: If you don’t see the email, check your spam folder or try resending the confirmation link from the website.
5. Secure Your Account
Once inside, enable two-factor authentication (2FA). This adds a critical layer of security. Here’s how to do it:
- Go to ‘Settings’ or ‘Security.’
- Select the 2FA option and link an authenticator app (like Google Authenticator or Authy).
- Follow the displayed steps to generate a QR code and sync it with the app.Warning: Save the backup codes provided. You’ll need them if you lose access to your authenticator app.
6. Complete Your Identity Verification (KYC)
To unlock all platform features, identity verification might be necessary. Here’s how to get it done:
- Navigate to the KYC section (often labeled as ‘Verification’).
- Upload a clear photo of your government-issued ID (passport, driver’s license, or national ID).
- Take a live selfie following the instructions on the screen.
- Provide any additional details as required.
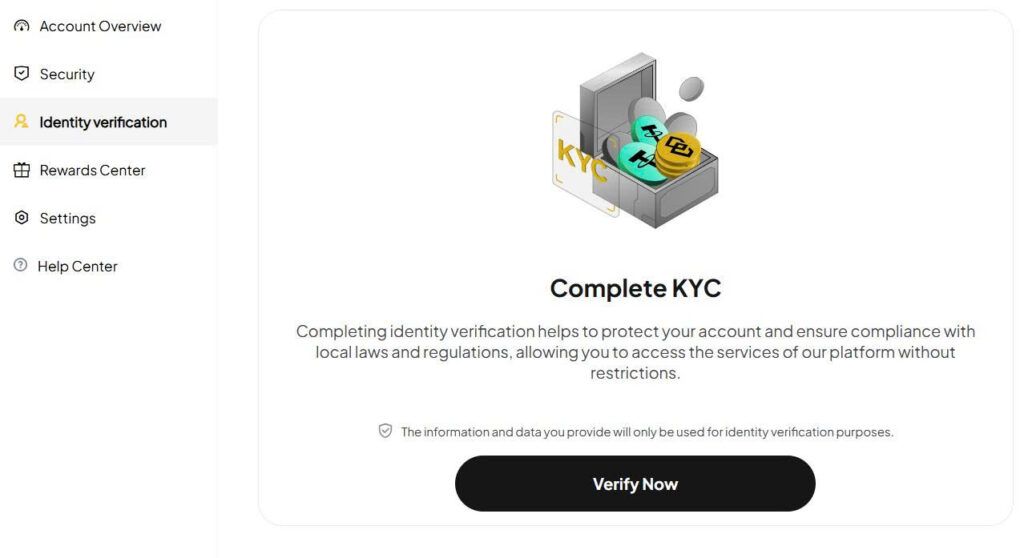 Most verifications are quick, but submitting accurate and readable documents helps avoid delays. Remember, some platforms allow limited functionality without full KYC, but completing it ensures fewer restrictions.
For more detailed guidance, consider resources like this verification process guide, which shares helpful tips on submitting KYC smoothly.
7. Add Funds to Your Account
Once verified, explore your funding options. Most platforms allow deposits in crypto or fiat currency. Carefully copy deposit addresses or follow bank transfer instructions to fund your account safely.
Note: Double-check wallet addresses during crypto transfers; transactions are irreversible.
8. Start Exploring and Trading
Your account is set up, verified, and funded now the platform’s features are ready for you. Familiarize yourself with the dashboard and tools, and start exploring earning opportunities.
Top Features Beginners Should Focus On in Weex
Native Rendering
One of the standout features of Weex is its ability to render interfaces natively. What does that mean for you as a beginner? It means your app doesn’t just look like a native app it is a native app, running directly on the device’s native UI components. This approach gives users a more seamless experience with faster load times and smooth animations.
To harness native rendering, start small. Focus on basic layouts like headers, footers, and buttons. Use the Weex tag for structure and style it to create visual flow. As you grow confident, incorporate animation effects. These native animations will feel fluid and enhance the polish of your app without much extra effort.
Quick Tip: Test frequently across platforms. A design that feels intuitive on one operating system may need tweaks on another. Make minor adjustments until everything clicks.
A Lightweight Framework
Weex doesn’t drown you in tools or configuration. It prides itself on being lightweight and efficient, which means you can focus on building rather than debugging unnecessary bloat.
As a beginner, this is where you should breathe a sigh of relief. With minimal complexity, getting started takes less time. Write your logic once, and Weex ensures it works across both Android and iOS. The less bulk in your framework, the faster your app both in terms of user experience and development speed.
Leverage this advantage by structuring your code clearly. Work in modules and prioritize simplicity in your designs, so you’re not overwhelming the lightweight build. Also, remember to think about performance. Each unnecessary dependency or poorly optimized line of code can compromise speed. It’s all about doing more with less.
Component-Based UI Creation
Weex’s component-based structure is a game-changer for beginners. Think of every part of your app whether it’s a button, a slider, or an image as reusable blocks. Once you create a component, you can drop it anywhere in your app, saving time and effort.
Getting started with components is straightforward. Start by building individual pieces maybe a custom button with hover effects or a simple input field. Then integrate them into larger structures like forms or navigation bars. The best part? When a component improves, you update it in one place, and every instance in your app gets that upgrade.
Why does this matter? It ensures your app remains consistent. No worries about mismatched button colors between screens or inconsistent padding. Everything stays uniform, and maintenance gets easier as your app grows.
Pro Tip: Name your components clearly. Use descriptive terms like LoginButton or HeaderBar, so when looking through files weeks later, you’re not scratching your head trying to remember what each does.
Focusing on these three features native rendering, lightweight design, and component reusability lays a strong foundation for app development. As a beginner, mastering these concepts will set you up for success. And once you’re comfortable, you’ll find Weex’s full potential opens even more possibilities for innovation.
Common Challenges New Users Face with Weex (And How to Solve Them)
Debugging Errors: Knowing Where Code Breaks
Writing code is exciting, but errors can quickly take the fun out of it. Beginners often hit a wall when the app doesn’t run as expected, and they can’t pinpoint why. Weex’s debugging tools may feel limited at first. Without access to robust developer consoles, diagnosing issues might feel like trying to solve a puzzle without all the pieces.
How to Solve It:
- Use remote debugging effectively: Weex offers debugging features that link to your browser’s developer tools. Use these to inspect runtime issues.
- Log everything: Add logs liberally when testing. Use console logs to track what’s happening. Eliminate guesswork.
- Leverage community forums: While you’re learning, rely on seasoned developers who’ve tackled similar issues. Often, they’ve already posted solutions or useful debugging tips online.
Integration Gaps: Connecting Weex with External Systems
No app lives in isolation. Perhaps you’re trying to connect your app with an external API or a third-party library. That’s where many new Weex users stumble. Not all APIs or external tools seamlessly integrate into the mobile app environment Weex provides. You could face compatibility issues or missing features.
How to Solve It:
- Study the Weex modules documentation: Some modules, like HTTP requests or file handling, need specific formats or approaches to work correctly. Ensure you’re following the guidelines.
- Handle fallbacks wisely: If an API isn’t playing nice, create failover logic that ensures your app doesn’t break outright. For example, cache responses or batch requests efficiently.
- Custom modules as a last resort: When third-party packages fail, write your own modules to fill gaps. It’s tricky but powerful.
Resource Limitations: Feeling the Weight of Limited Options
As a beginner, it’s easy to feel boxed in by what’s available. Weex is powerful, but it deliberately maintains a streamlined toolkit to keep performance high. If you’re coming from other app development ecosystems, you might miss bells and whistles like broad UI libraries or plugins.
How to Solve It:
- Build custom solutions one block at a time: Weex is minimal for a reason. Take this as a chance to build exactly what your app needs without bloating it with extras.
- Experiment with style tweaks: Weex’s simplicity doesn’t mean dull designs. Dive into styling options to craft a unique, user-friendly interface.
- Explore third-party bridges: While not always perfect, there are existing community-driven additions you can bring in to extend basic functionality. Test carefully.
Getting Disoriented: Navigating the Weex Ecosystem
Weex might feel unfamiliar if you’re used to more traditional development frameworks. The terminology, structure, and execution flow can seem strange at first. Many beginners struggle with understanding how it all fits together.
How to Solve It:
- Start small: Break larger projects into bite-sized ideas. Implement one feature (e.g., navigation or animation) at a time. Big projects can overwhelm.
- Follow walkthroughs or official guides: Despite its minimal branding, the official resources provided by Weex are highly detailed. They can shortcut your learning curve immensely. You can check out resources like this signup guide to start grasping account systems or other key aspects.
- Read the code base: Look into open-source projects built with Weex. Reading code written by others provides clarity on how things are done professionally.
Final Thoughts on Facing Challenges with Confidence
Every tech stack comes with its quirks, and Weex is no different. The key isn’t to avoid challenges but to approach them methodically. Slow down, seek support when needed, and keep experimenting until it clicks.
Optimizing Performance: Best Practices for Beginners
Optimizing Performance in Weex Is All About the Details
Getting the most out of Weex requires careful choices, especially as a beginner. Efficiency isn’t just about writing code that works—it’s about writing code that works smartly. Let’s break down the strategies you can use to deliver high-performing apps across all devices.
Use Native Components Wherever You Can
Weex is built to bridge JavaScript code and native mobile capabilities. But not all components are created equally when it comes to performance. Always prioritize native components over custom ones whenever possible. Why? Native components are optimized for their respective platforms out of the box. Creating your own alternatives might seem like a shortcut, but it often adds a layer of JS overhead.
Here’s an example: If your app has heavy scrolling views, stick to using native list or scroller tags. A custom, JavaScript-heavy implementation will eat up memory and slow down rendering. Native elements are faster because they bypass the JavaScript thread and talk directly with platform UI rendering pipelines.
Avoid Runtime Bottlenecks
The performance bottlenecks in Weex often arise from poor runtime management. At its core, Weex operates across three threads: JavaScript, native UI, and rendering. If your app overloads the JavaScript thread with too many calculations or callbacks, performance tanks.
Here’s a quick list of what to avoid:
- Too many listeners: Don’t overuse event listeners or observers. They add unnecessary overhead.
- Heavy calculations on the main thread: Offload computations to worker threads if they’re complex.
- Unnecessary DOM updates: Rendering should be deliberate. Batch changes together to avoid multiple redraws.
Pro tip: Trim your app’s JavaScript bundle size by eliminating unused imports or dependencies. A leaner script runs with fewer delays.
Optimize for a Range of Devices
Not all your users will have top-of-the-line smartphones, but they’ll still expect seamless performance. Optimize for older or mid-range devices by considering:
- Asset Loading
Always asynchronously load assets like images and large chunks of data. Use lightweight placeholder images for placeholders while actual files load in the background. For example, consider lazy-loading images only when they enter the viewport. - Conditional Functionality
Detect the device type or screen resolution on app initialization. You can include scaled-down UI functionality for older devices. For instance, disable non-essential animations or effects on slower processors. - Minimize Memory Usage
Devices with lower RAM can struggle with apps that don’t handle memory well. Optimize memory by cleaning up subscriptions, closing unused pages, or destroying heavy objects when no longer needed. Keep your app lean and efficient.
Monitor and Test Performance Early
Performance issues multiply if ignored. Even at the prototype stage, develop the habit of testing app speed and responsiveness:
- Use profiling tools to measure render time, memory allocation, and JavaScript execution paths.
- Identify and resolve bottlenecks as they occur, instead of waiting until deployment.
Small, consistent tweaks over time lead to a smoothly running app across all platforms.
A Foundation for Efficiency
By keeping these practices in mind and sticking with the fundamentals of Weex, you’re building applications that will not just work—they’ll thrive. Smart use of native components, runtime efficiency, and device-conscious choices are your stepping stones. Keep iterating and remember: optimization isn’t a single-step process—it evolves as your app grows.
Final words
Mastering Weex doesn’t require reinventing the wheel, but it does call for a clear understanding of its foundational tools and features. As a new user, you now know why Weex is a top choice for efficient app development and how to set it up, work with its architecture, and avoid common pitfalls. What sets Weex apart is the dynamic combination of native performance and cross-platform flexibility, making it a competitive choice in today’s development framework landscape. As you embark on your Weex journey, remember to focus on incremental learning, experiment with its components, and put optimization practices into action. Start small, build consistently, and soon you’ll create professional-grade applications that leverage the full potential of this unique tool.
Sign up today to start your journey with Weex and build seamless cross-platform apps with efficiency.
Learn more: https://cryplinker.com/
About us
Crypto Linker provides seamless solutions to empower developers leveraging Weex and other modern frameworks for optimized app performance and security.